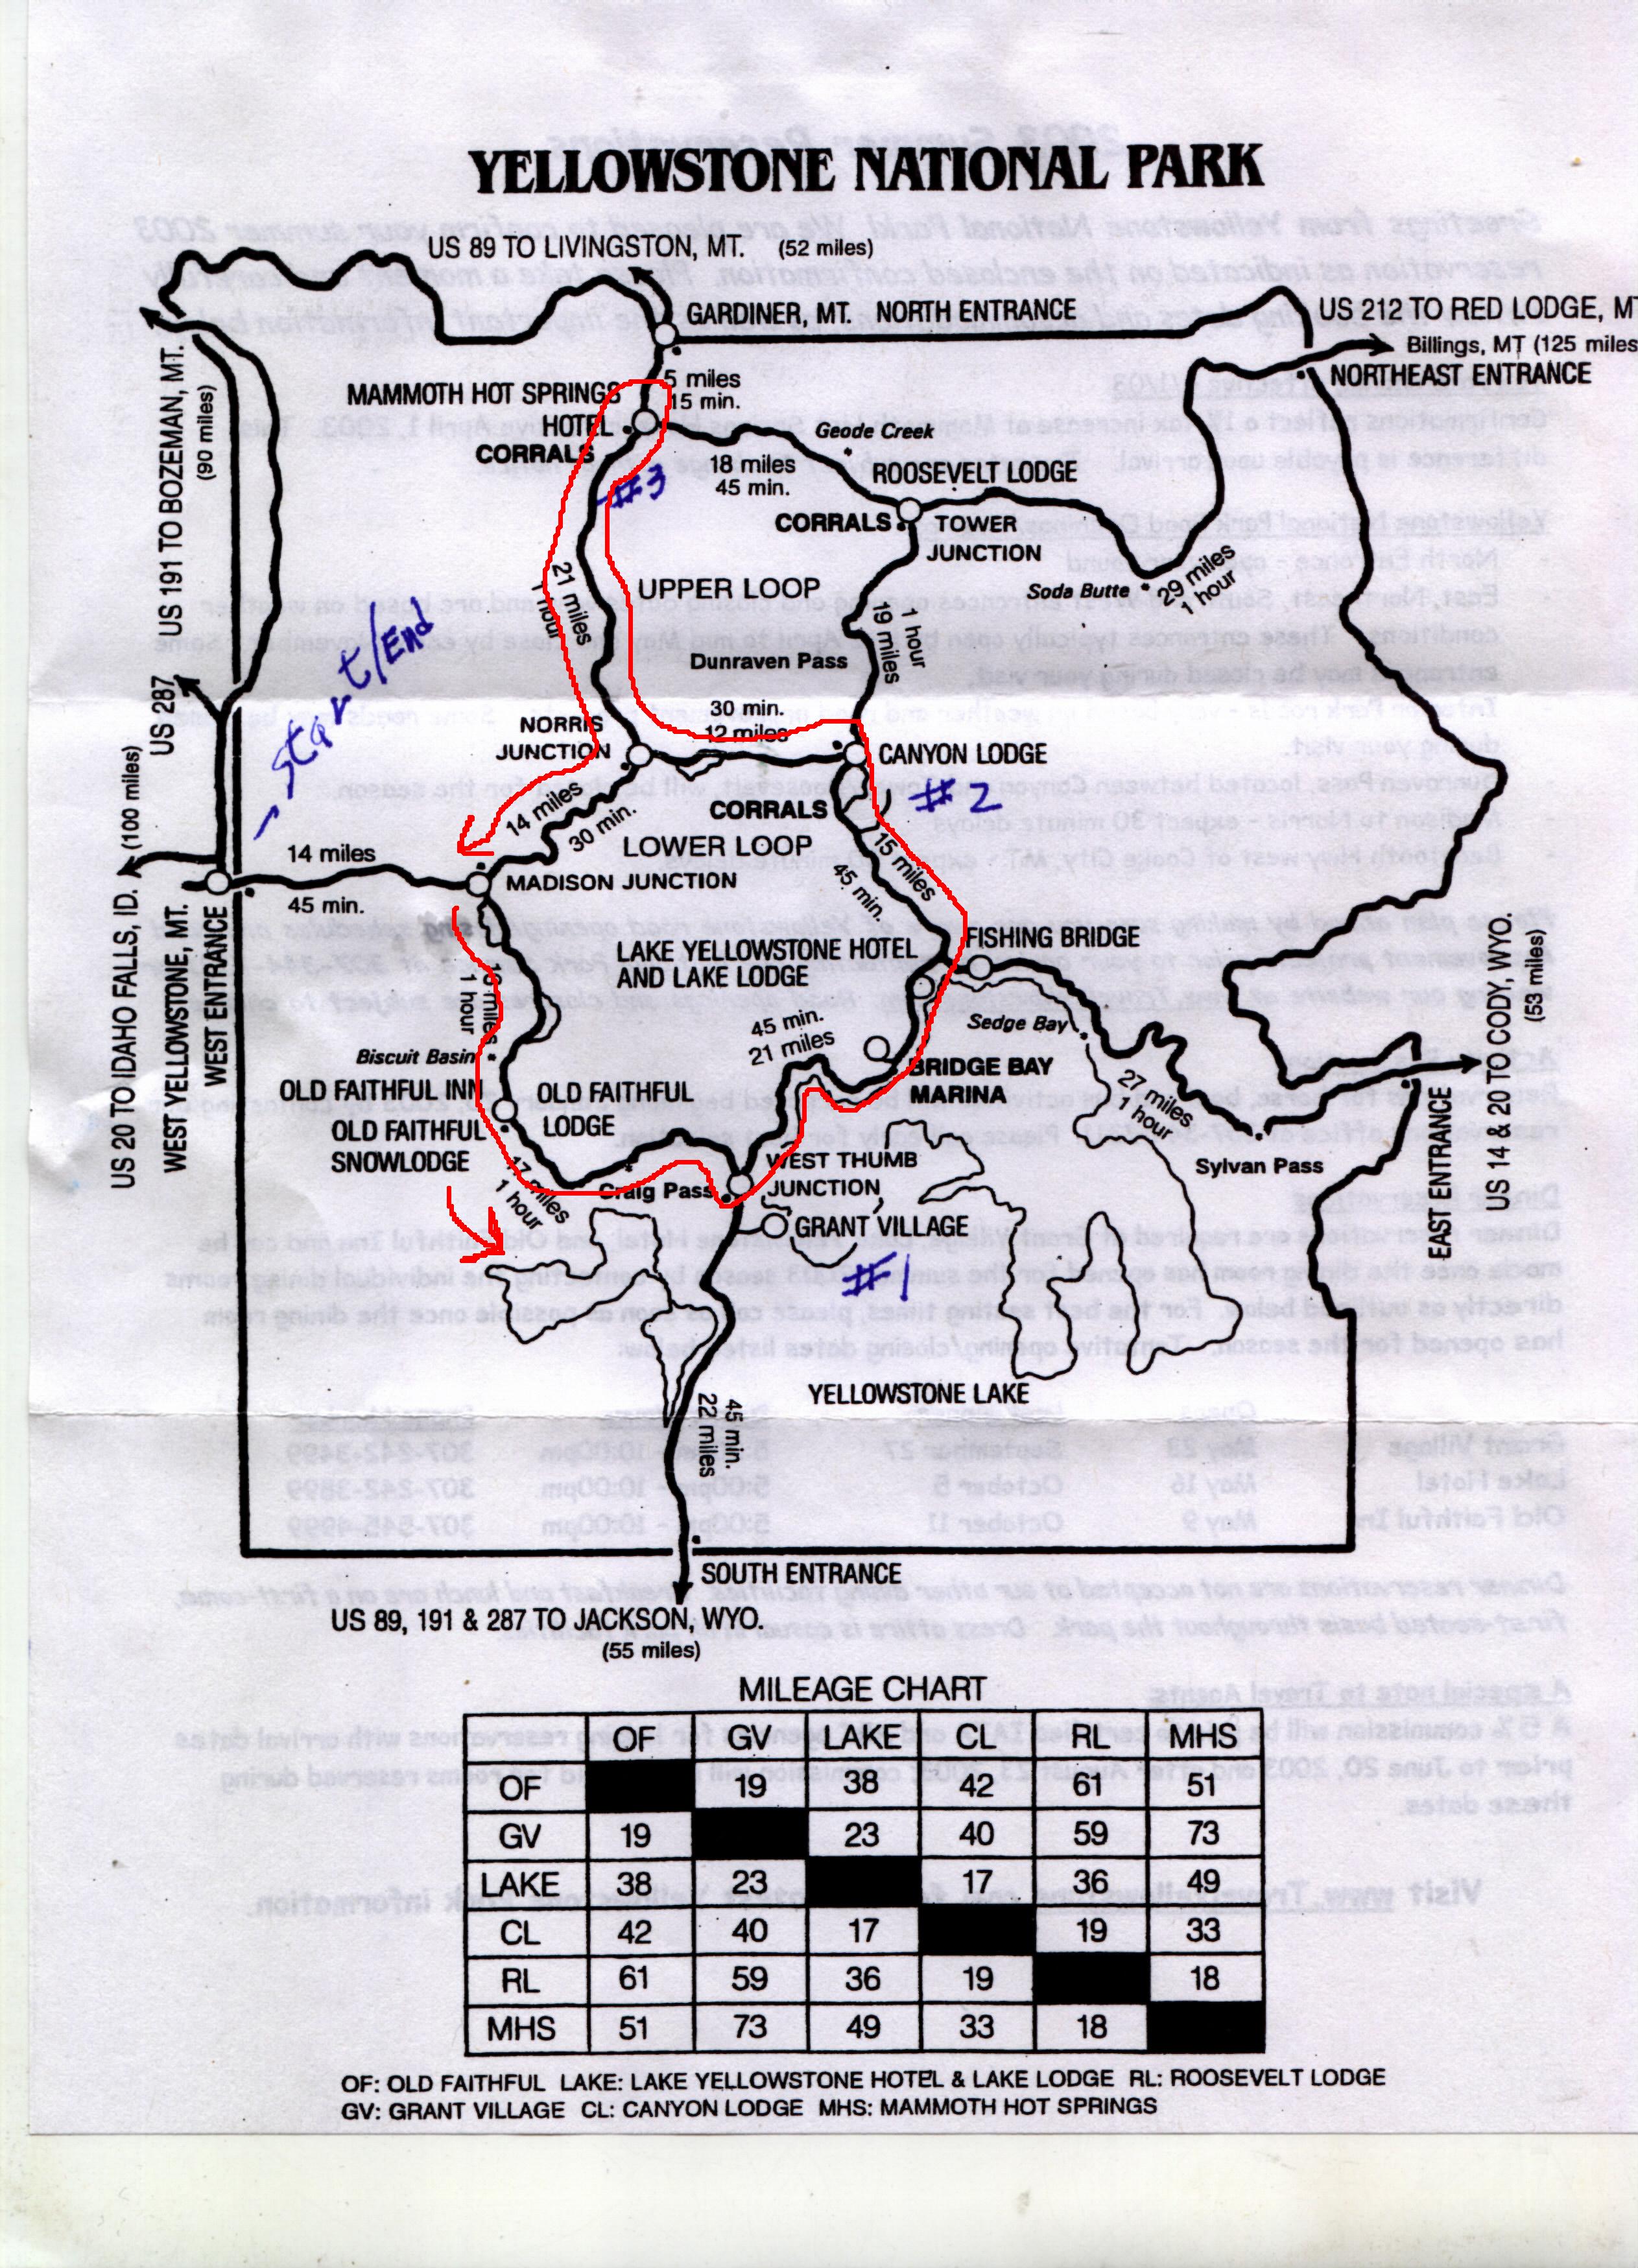
Basic map of the area. The original idea was to do a circumnavigation by the outside edge of the figure-8. However, Ken was unsuccessful in negotiating for us to go over Dunraven Pass (we were 1-2 days early and thousands of logs were allegedly being felled that day), so we did the less-aesthetic figure-6 instead.